Installing solar roof vent systems without hurting attic performance
a[data-rs-seo-link]{text-decoration:underline!important;color:#1a56db!important;cursor:pointer!important;}a[data-rs-seo-link]{text-decoration:underline!important;color:#1a56db!important;cursor:pointer!important;}
Start with the real goal of attic ventilation
Installing solar roof vent systems can be useful when a vented attic has high summer heat, limited upper exhaust, and enough low intake air to feed the fan. The job should not start with the fan. It should start with the attic assembly: air sealing at the ceiling plane, adequate insulation, clear soffit or eave intake, and a code-compliant balance between intake and exhaust.
A solar roof vent uses a small photovoltaic panel to power a roof-mounted attic fan, so it can exhaust attic air without drawing utility electricity. That separates it from a hardwired powered attic ventilator, but it does not remove the building-science risk of depressurizing the attic. If the fan cannot draw outdoor air from soffits or other low vents, it may pull conditioned air from the living space through ceiling gaps.
For homeowners comparing ventilation upgrades, the first question is not “How many fans do I need?” It is “Where will the replacement air come from?” More energy-focused home improvement topics are covered in the Efficiency Guides section.
What a solar roof vent does and what it does not do
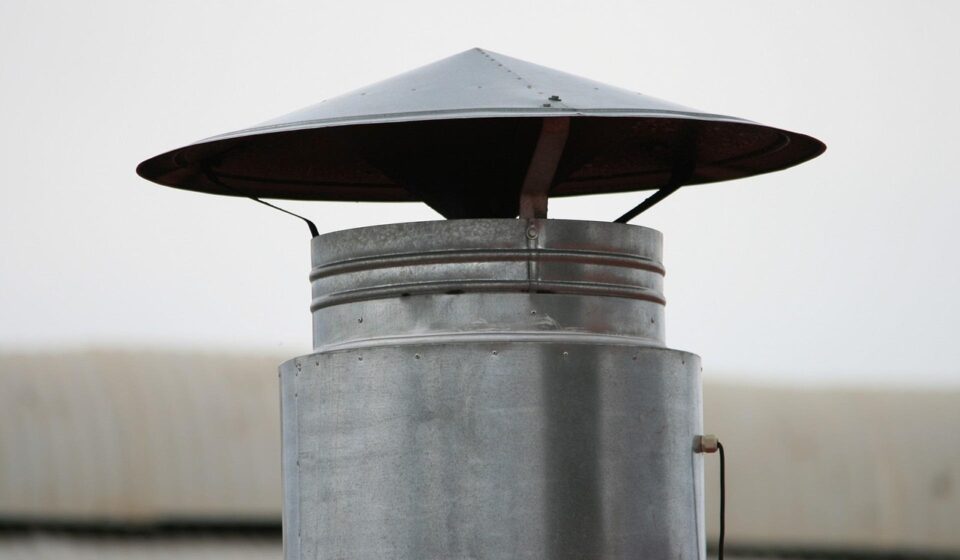
A solar roof vent is a powered attic ventilator mounted through the roof deck, usually near the upper portion of a vented attic. When sunlight reaches the panel, the motor turns a fan that exhausts hot attic air outdoors. Cooler outdoor air should enter through lower intake vents such as soffit, eave, or low roof intake vents. In theory, this supports the same high-low airflow pattern used by a passive ridge-and-soffit system, but with mechanical assistance at the exhaust point.
The vent does not condition occupied rooms. It does not replace ceiling insulation. It does not solve disconnected ducts, bath fans dumping into the attic, blocked soffits, or air leakage around recessed lights. It also will not run at full output at night, during heavy cloud cover, under shade, or when the panel orientation is poor. Hybrid models may include backup electrical power, but that changes both the installation requirements and the operating cost.
This distinction matters because many attic comfort complaints come from heat transfer through the ceiling, leaky ductwork in the attic, or air leakage between the home and attic. Research summarized by the U.S. Department of Energy’s Building America program notes that attic fans can reduce attic air temperature, but the cooling benefit to the living area is often smaller than homeowners expect because a large share of roof heat transfer is radiant heat from the hot roof deck to the insulation surface.
Check code, roof condition, and attic type before choosing a fan
Before installing any roof-mounted fan, confirm that the attic is actually intended to be vented. A conventional vented attic has insulation at the attic floor and outdoor air moving above it. An unvented conditioned attic has insulation along the roofline and is handled differently. Adding a powered roof vent to an unvented conditioned attic can undermine the design and may create moisture or pressure problems.
For vented attics, the commonly referenced International Residential Code approach is based on net free ventilating area, not the outside dimensions of vent covers. The model code’s baseline rule is often described as 1 square foot of net free vent area for every 150 square feet of vented attic area. A reduced 1-to-300 ratio is allowed under specific conditions, including a balanced high-low layout. In cold climate zones 6, 7, and 8, a proper warm-side vapor retarder is also part of the exception. Local code adoption, roofing manufacturer instructions, wildfire rules, and permit requirements can be stricter, so the local building department and the roof product documentation should control the final decision.
Roof condition matters too. A brittle, aging, or recently storm-damaged roof is a poor candidate for a new roof penetration. If reroofing is planned soon, it may be smarter to coordinate ventilation changes with that project so flashing, underlayment, and shingle integration are handled as one roof system.
When a solar roof vent may make sense
A solar roof vent is most defensible as a targeted retrofit, not as a universal energy upgrade. It may be worth evaluating when the attic is vented, summer attic temperatures are extreme, passive high exhaust is limited, and adding a full ridge vent is impractical because of roof geometry, hips, short ridges, architectural constraints, or cost. It can also be relevant where a homeowner wants daytime-only operation without adding a new electrical circuit.
The best candidates usually share several conditions. The attic floor is air sealed, ceiling penetrations are controlled, bath and kitchen fans already exhaust outdoors, soffit or eave intake is open, and there is enough net free intake area to feed the fan. Homes with HVAC ducts or an air handler in a hot attic may feel more benefit from lowering attic temperatures than homes with all ducts inside conditioned space. Older homes with modest attic insulation may also show more noticeable improvement, though adding insulation and air sealing should usually come first.
There is evidence that photovoltaic attic ventilation can produce measurable reductions in attic temperature in specific circumstances. A Florida Solar Energy Center case study published in 2000 monitored a Central Florida home where two photovoltaic attic ventilators were installed in August 1997. The study found that peak attic temperature dropped by more than 20 degrees Fahrenheit and measured space-cooling electricity use fell by about 6 percent during the matched comparison period. That result is useful, but it should not be treated as a universal promise. The test home, climate, roof color, insulation level, duct location, and occupant conditions all shaped the outcome.
When to avoid or delay installing one
Delay the installation if the attic has obvious air leakage from the living space. Common leakage points include attic hatches, plumbing chases, open wall tops, recessed lights, dropped soffits, duct boots, wiring penetrations, and gaps around bath fans. A powered exhaust fan creates negative pressure in the attic. If the easiest replacement air path is through those leaks, the fan can pull cooled indoor air into the attic in summer or warm, humid indoor air into the attic in winter.
Also avoid using a solar roof vent as the primary fix for moisture stains, mold, frost, or ice dams until the cause is understood. Moisture in attics is often driven by indoor air leakage, bathroom exhaust routed into the attic, duct leakage, or insufficient insulation at the ceiling plane. More exhaust can sometimes make moisture problems worse by pulling additional house air into a cold attic. DOE guidance on attic air sealing emphasizes sealing ceiling penetrations because it saves energy and helps prevent moisture problems.
A fan can also be a poor fit in wildfire-prone locations if vents are not ember-resistant and screened according to local requirements. In areas with combustion appliances, radon concerns, attached garages, or crawl spaces, pressure effects deserve special attention. If the home has natural-draft combustion equipment, consult a qualified professional before adding any device that may alter pressure relationships.
How to plan the installation
Calculate attic area and existing vent capacity
Measure the vented attic floor area first. Then inventory existing intake and exhaust vents by type, location, and net free area. Net free area is the open airflow area after louvers, mesh, and screens are considered. Product labels may state it in square inches. If labels are missing, do not assume the gross vent size equals airflow capacity.
Use code requirements as the floor, not the target for performance. A balanced passive system usually has intake low and exhaust high. If a solar roof vent is added as high exhaust without enough low intake, the attic can become more negatively pressured. In many retrofits, adding or clearing soffit intake does more for system balance than adding more exhaust. See also: Buying Guides.
Select fan capacity conservatively
More airflow is not automatically better. Oversized attic fans can increase pressure imbalance and raise the chance that replacement air comes from the house instead of outdoors. Building America guidance recommends risk-reduction steps such as thorough ceiling air sealing, ample intake, lower fan flow, solar-powered operation, and locating the fan high with intake low and distributed around the perimeter. Choose a fan whose rated airflow matches the actual intake strategy, not just the marketing coverage number on a box.
Choose a location that supports airflow and roof durability
The fan should usually be high on the roof plane, but not so close to ridges, valleys, hips, skylights, plumbing vents, chimneys, or existing roof penetrations that flashing becomes difficult. Place it where air can sweep through the attic rather than short-circuiting from a nearby gable or roof vent. Avoid shaded roof areas if the unit depends only on its solar panel. South or west exposure often provides strong summer production in much of the United States, but the best orientation depends on roof shape, tree cover, and local climate.
Installation sequence for a roof-mounted solar vent
Exact steps vary by product and roofing material, so manufacturer instructions and local code should lead the job. In general, a careful installation follows this sequence:
- Confirm attic type, local code requirements, roof warranty conditions, and whether a permit is required.
- Air seal the attic floor before installing the fan, especially around ceiling penetrations and attic access panels.
- Verify that bath fans, kitchen exhaust, dryers, and combustion vents do not terminate in the attic.
- Clear blocked soffit or eave vents and add baffles where insulation restricts intake airflow.
- Calculate existing intake and exhaust net free area and decide whether additional intake is needed.
- Mark the fan location from inside the attic, checking for rafters, wiring, ducts, plumbing vents, and roof obstructions.
- Cut the roof opening only after confirming layout from both inside and outside.
- Integrate the vent flashing with shingles and underlayment so water sheds over the top and around the sides, not behind the flashing.
- Fasten according to the product instructions and use compatible sealants only where specified.
- Set the panel angle or remote panel location, if adjustable, for reliable sun exposure.
- Test fan operation in direct sun and inspect for air movement at intake locations.
- After the first heavy rain, check the attic around the penetration for leaks.
Homeowners comfortable with basic maintenance may be able to inspect intake vents and attic air sealing, but cutting a roof deck and integrating flashing is usually best handled by a qualified roofing professional. The cost of repairing a roof leak can quickly exceed the cost of proper installation.
Performance expectations and practical trade-offs
A realistic expectation is that a solar roof vent may lower attic air temperature during sunny periods and may improve comfort in certain houses. It should not be sold or evaluated as a guaranteed utility-bill reducer. Savings depend on climate, ceiling insulation, roof color, radiant barriers, shading, duct location, air leakage, thermostat behavior, and how much solar output the fan actually receives.
The main trade-off is pressure. Passive ridge-and-soffit ventilation relies on wind and stack effect, so pressure differences are usually modest. A fan actively exhausts air. That can be helpful if the air comes from the outdoors through low intake vents, but counterproductive if it pulls air from the home. This is why air sealing and intake capacity are not optional preparation steps; they are central to the installation.
| Condition | Effect on solar roof vent value | Better first step |
|---|---|---|
| Blocked soffits | Raises risk of pulling air from the house | Clear intake and add baffles |
| Leaky attic floor | Can increase cooling or heating losses | Air seal ceiling penetrations |
| Low insulation | May make attic heat more noticeable | Seal first, then insulate to local targets |
| Ducts in hot attic | May increase comfort benefit | Seal and insulate ducts |
| Unvented conditioned attic | Often conflicts with the assembly | Do not add a vent without design review |
Maintenance after installation
After installation, inspect the unit at least seasonally. Look for loose fasteners, cracked sealant where sealant is part of the approved detail, damaged flashing, debris around the hood, bird or pest activity, and panel soiling. In dusty or pollen-heavy areas, a dirty panel can reduce fan output. After storms, check that wind-driven debris has not blocked nearby intake vents.
Inside the attic, watch for changes in humidity, staining, rust on fasteners, or darkening of roof sheathing. If these appear after the fan is added, do not simply add more exhaust. Recheck air sealing, exhaust duct routing, and intake balance. A solar roof vent should support an already sound attic strategy; it should not become the only strategy.
Frequently asked questions
Will a solar roof vent lower my electric bill?
It might in some homes, but it should not be expected as a guaranteed payback measure. The strongest candidates are hot-climate homes with poorly shaded roofs, limited passive exhaust, ducts in the attic, or lower insulation levels. Even then, air sealing and insulation often provide more reliable energy value.
How many solar roof vents do I need?
The answer depends on attic floor area, existing net free vent area, intake capacity, roof layout, fan airflow, and local code. Do not size only by a manufacturer’s square-foot coverage claim. Confirm that low intake can supply the fan without pulling air from the conditioned space.
Can I install a solar roof vent with a ridge vent?
Sometimes, but the combination can short-circuit airflow if the fan pulls replacement air from the nearby ridge instead of from the soffits. A professional should evaluate whether the fan location will improve cross-ventilation or disrupt an existing passive system.
Is a solar roof vent better than adding more insulation?
Usually no. They solve different problems. Insulation slows heat flow into the living space, while a vent changes attic air exchange. If the attic is under-insulated or leaky, air sealing and insulation should usually come before mechanical attic ventilation.
Does a solar roof vent work on cloudy days?
Output drops when sunlight is weak, unless the product has battery storage or a hybrid electrical backup. For most basic solar attic fans, performance is strongest during direct sun, which also tends to align with the hottest roof conditions.
Bottom line
Installing a solar roof vent can be a reasonable upgrade when it is part of a balanced attic ventilation plan. It is most likely to help when the attic is vented, intake air is ample, the attic floor is sealed, and the roof penetration is installed with durable flashing. It is least likely to help when it is used to compensate for blocked soffits, air leaks, poor insulation, duct problems, or moisture sources. Treat the fan as one component in a roof-and-attic system, and the installation will be safer, more durable, and easier to evaluate after the first hot season.